Project Status Tracking and Reporting Tool
  • Status Reporting
  • KPI Radar
  • Strategic Foresight
  • Pricing
  • Resources
    • Blog
    • Product release
    • White Paper
    • Help Center

Contact us

Try it free
Project Status Tracking and Reporting Tool
  • Status Reporting
  • KPI Radar
  • Strategic Foresight
  • Pricing
  • About us
  • Resources
    • Blog
    • Product Release
    • White Paper
    • Help Center
  • Join Radar Team
  • Contact us
  • Try it free

Help Center

Quick Start

4
  • Radar overview
  • How to create a workspace?
  • How to set a workspace name?
  • What access levels / user roles are there?

Account Settings

4
  • How can I change the email address associated with my account?
  • How to reset my password?
  • How can I manage email notifications?
  • How can I delete my account?

Billing and Subscriptions

5
  • Where can I find information about the end date of my subscription?
  • How can I find out if I have reached my project limit in my workspace?
  • How can I know if my subscription has expired?
  • Where can I find information about my payments?
  • What payment options are available?

Fields and Configuration

4
  • What is a field? 
  • How to create a field
  • Field actions
  • Templates

Projects

8
  • How can I filter project data?
  • How to manage project-level permissions?
  • How to export the project list and project data?
  • How to add a project manually?
  • Everything on project connections
  • How to add a project by importing data from Excel?
  • How to add a project by importing data from Jira?
  • How to edit a project?

Views

5
  • What views are available?
  • How to create a view
  • How to share a view
  • How to copy a view?
  • How to delete a view?

Customization

3
  • Can I customize the Radar view?
  • Can I customize the tenant’s logo?
  • Can I change the preview image on the login screen?

Users

5
  • Invite new users to your workspace
  • How to edit a user
  • How to deactivate and delete users
  • Roles and permissions
  • How to create a user group

Status Reporting

2
  • Project status reporting
  • How to schedule and automate report releases?

Strategic Foresight

9
  • What is strategic foresight?
  • How to enable voting?
  • How to add voting results to a view?
  • How to estimate project parameters with a community?
  • How to view project parameters estimation results?
  • How to switch on iterating through signals using wizard?
  • How to make a view accessible to all workspace users?
  • How to share the common registration link?
  • How to participate in strategic foresight?

Chats and Notifications

2
  • How to use chats in Radar?
  • How to use notifications in Radar?
  • Home
  • Help center
  • Views
  • How to share a view
View Categories

How to share a view

If you create a view, or if you were provided a right to edit one, you can share it with other users of your workspace as well as with people without a Radar account.

Skip ahead to:

  • Share with users
  • Change user access rights
  • Share via link
  • Disable link access

Share with users

When you share a view within your workspace, there are two types of permissions that you can grant:

Permission to edit a view provides a user with the ability to manage what projects and data are included, what filters are available, the general look of a view, and the structure and layout of reports;

Permission to view allows a user to access and interact with a view but not make changes to its configuration, appearance, or any predefined functionality.

Note

A right to edit a view does not override any project-level permissions. In other words, a user who is only permitted to view a project will continue to have this right alone, even if they become allowed to edit a view containing the project.

To share a view with other users:

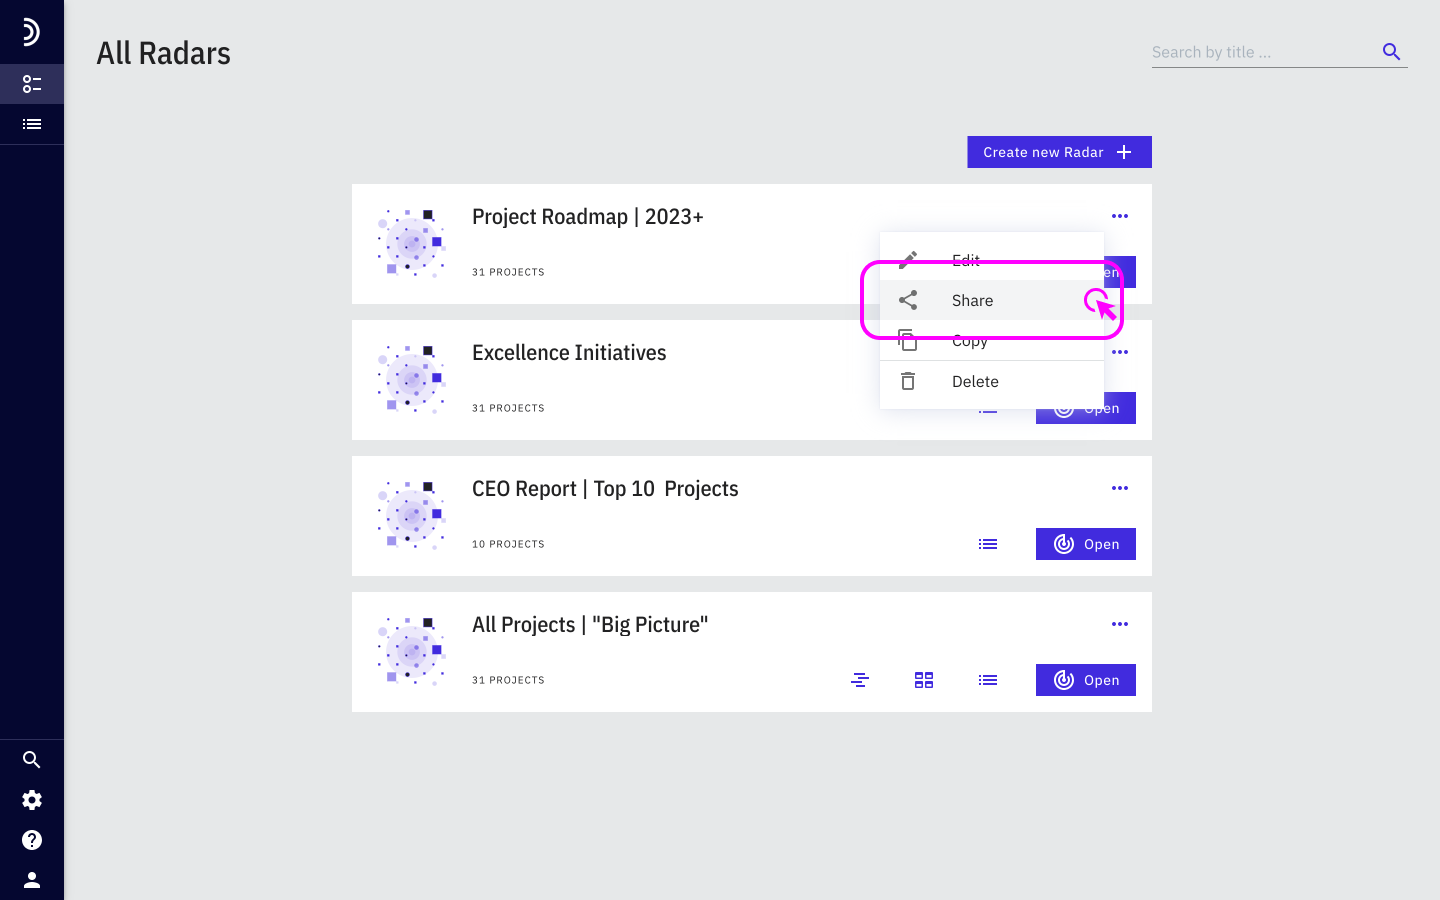
1. Go to Overview and locate the view you want to share.

2. Click the three dots and select Share. Alternatively, open the view and then click the share icon at the top of the screen.
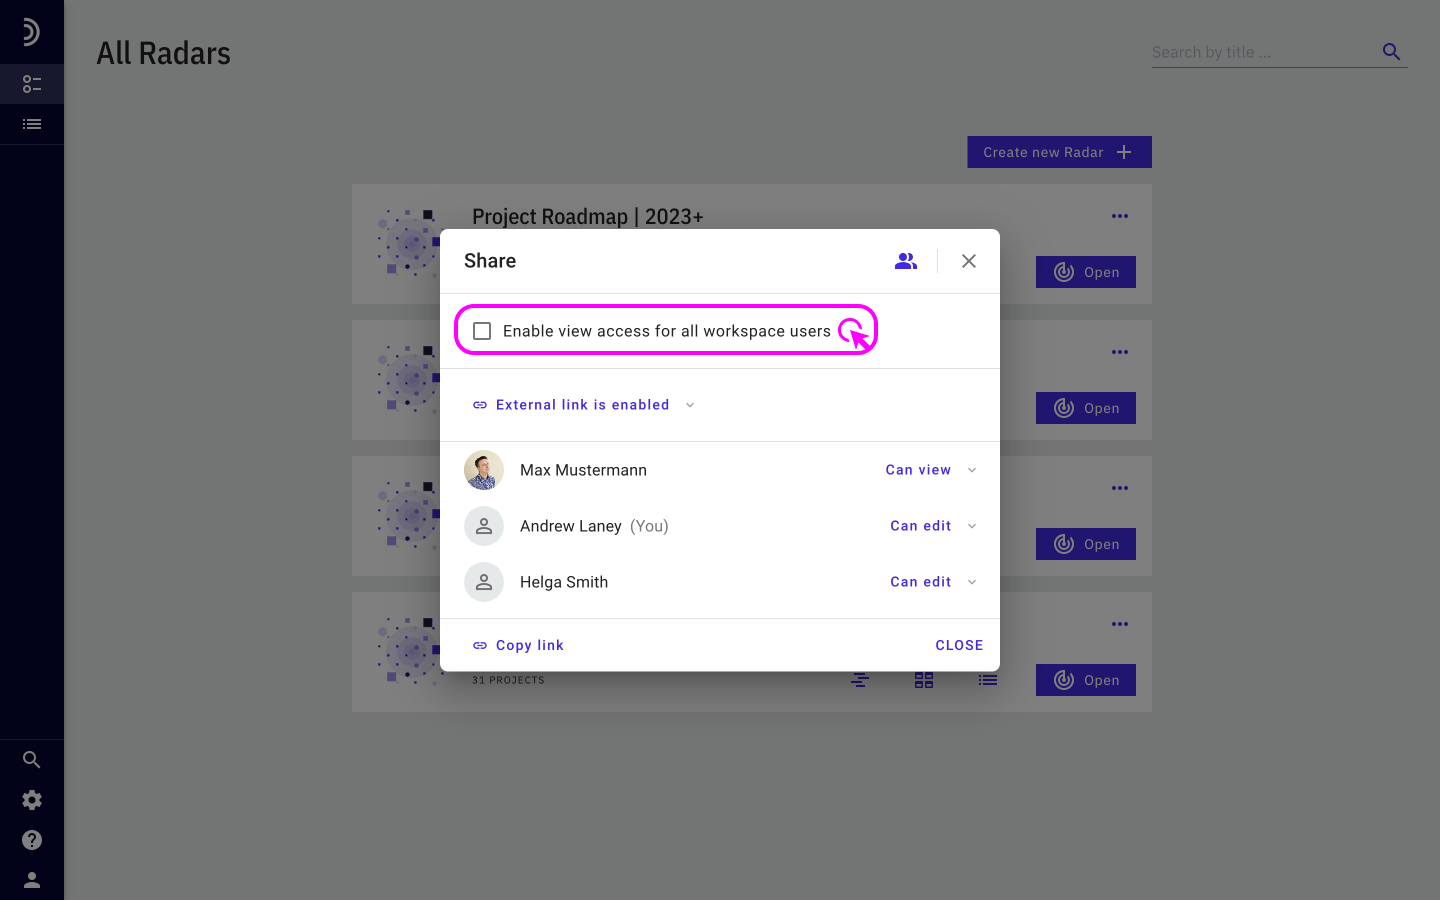
3. Click the users icon.
4. Check the boxes next to the users and groups with whom you want to share the view.

5. Based on the type of permission you wish to grant, select a Can view or Can edit option beside each name. Permission to view is set as the default option.
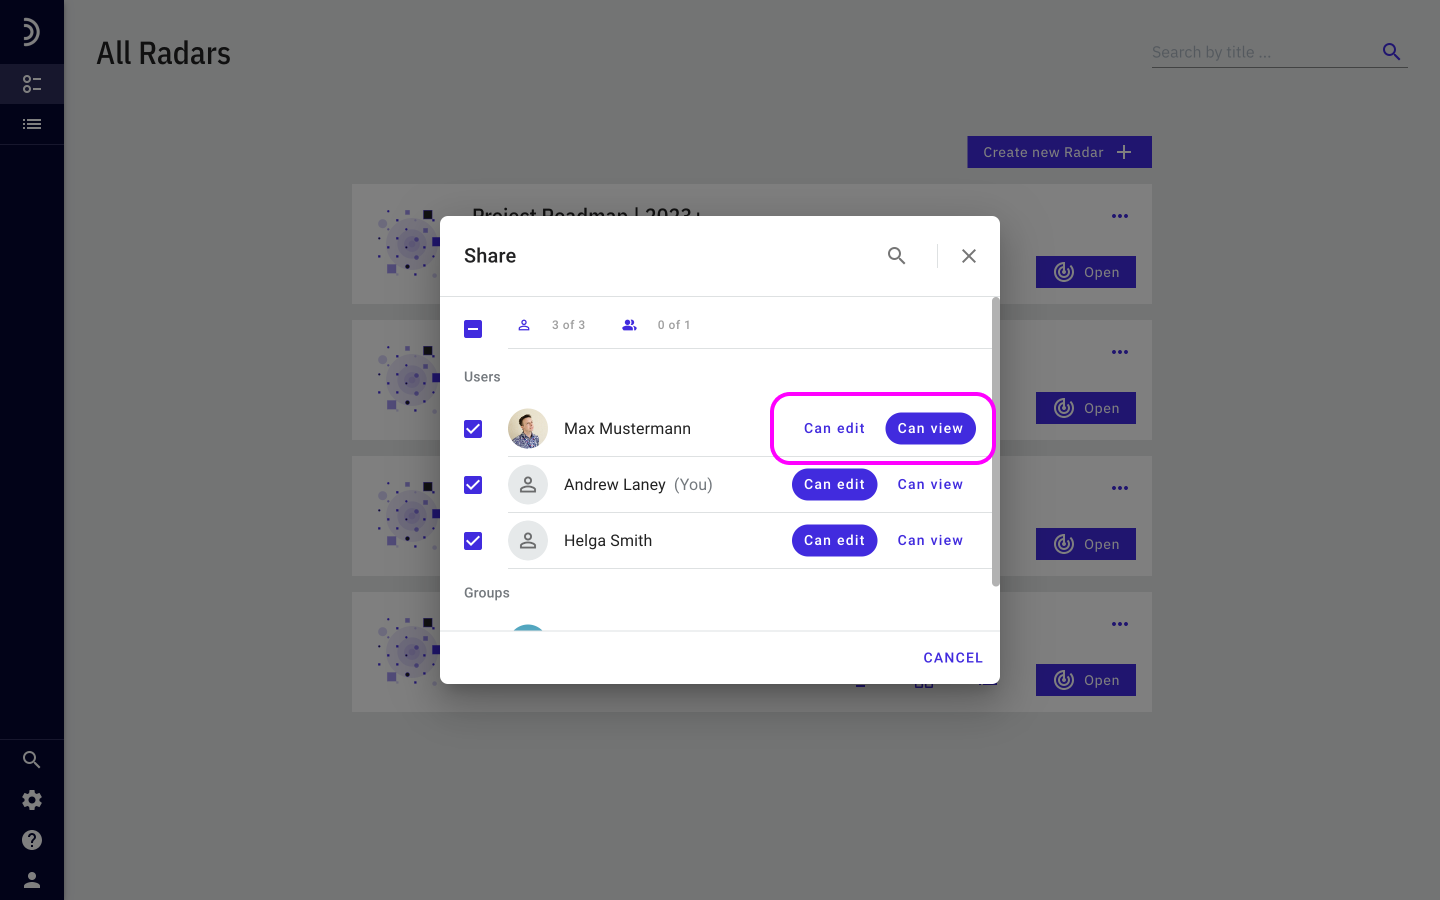
The users you have chosen as your target audience will be notified by email that they have been provided access and will see the view appear in their own Overview area.

Tip!

You can grant permission to view the radar report to all authorized users by checking the “Enable view access for all workspace users” checkbox. This option does not override explicitly granted permissions, so you can check the checkbox and optionally grant editing permissions to selected users.

Change user access rights

As a user with the right to edit and therefore also share a view, you can change or revoke any type of permission that you or someone else has granted a user or a group of users.

To change or revoke access to a view:

1. Go to Overview and locate the shared view.

2. Click the three dots and select Share. Alternatively, open the view and then click the share icon at the top of the screen.

3. Locate the name of the user or group whose access privileges you want to adjust.

4. To the right of the name, click on the drop-down selector which shows a currently set permission.
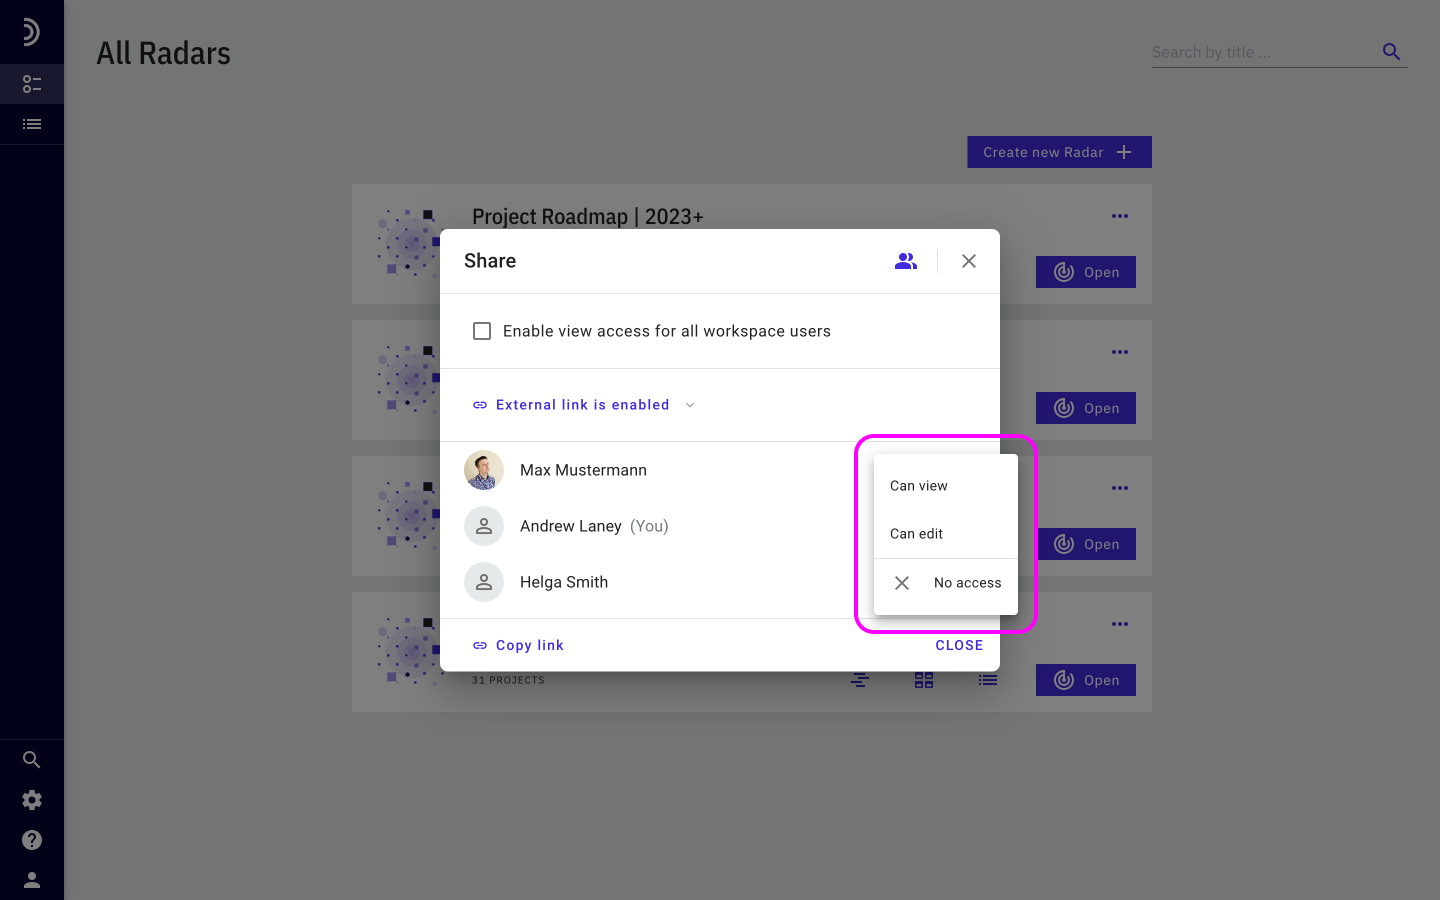
5. Choose a different type of permission, or remove all permissions by selecting No access.

The changes you make to user access rights apply immediately.
Share via link

Sharing views using a link is an easy way to provide view-only access to users both with and without a Radar account since a link can be opened in any browser.

Everyone with a link to a shared view sees the same projects and data. However, for users who are currently logged in to the workspace, the view will open based on their personal settings or filters, if such were set.

To share a view using a link:

1. Go to Overview and locate the view you want to share.

2. Click the three dots and select Share. Alternatively, open the view and then click the share icon at the top of the screen.

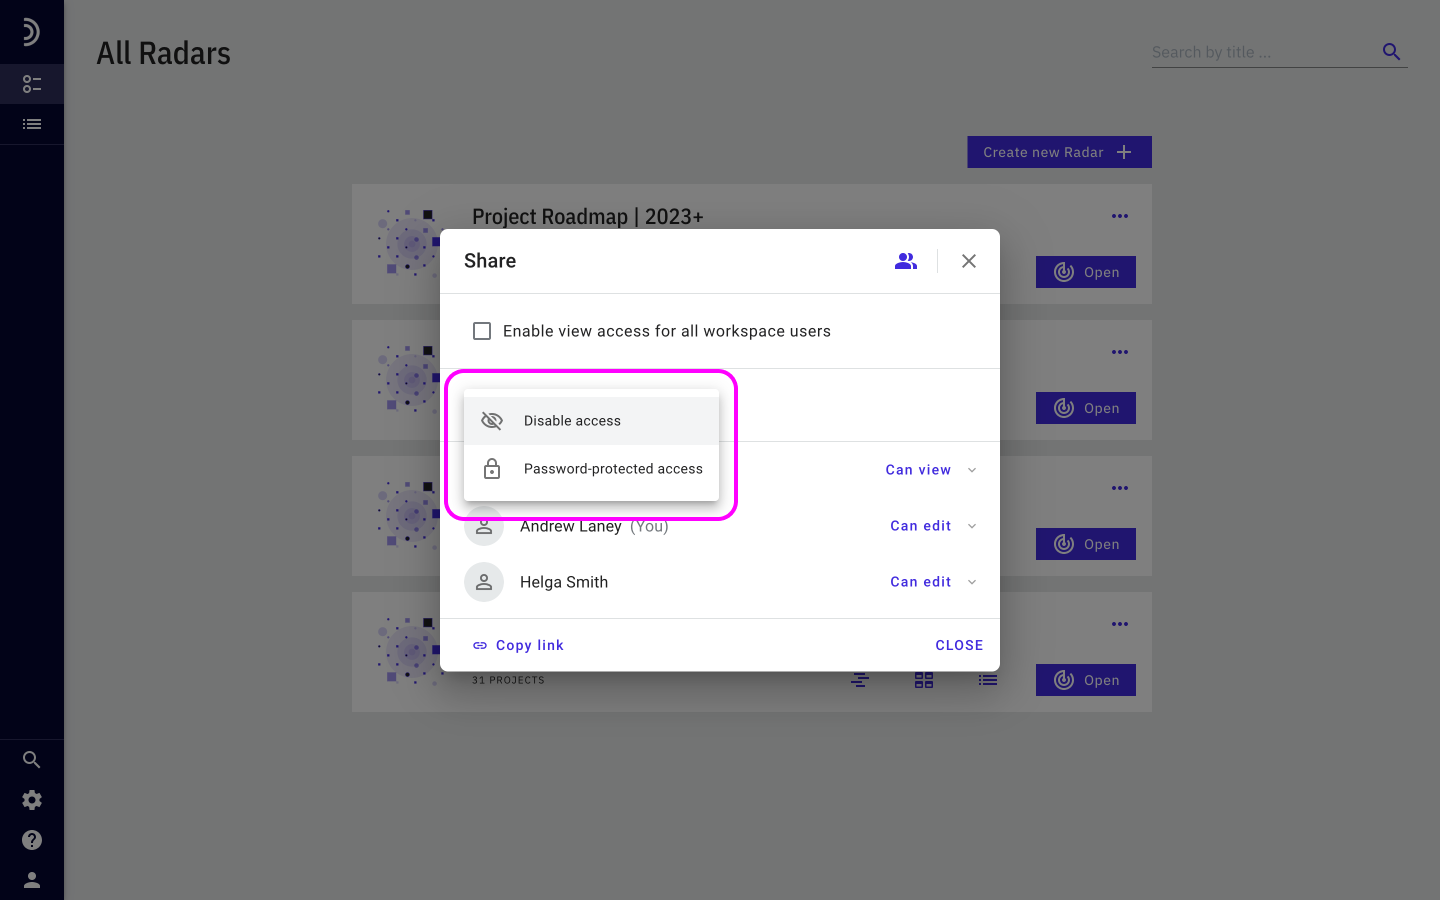
3. Click “Access via link is disabled.”

4. Select Free link access or Password-protected access.
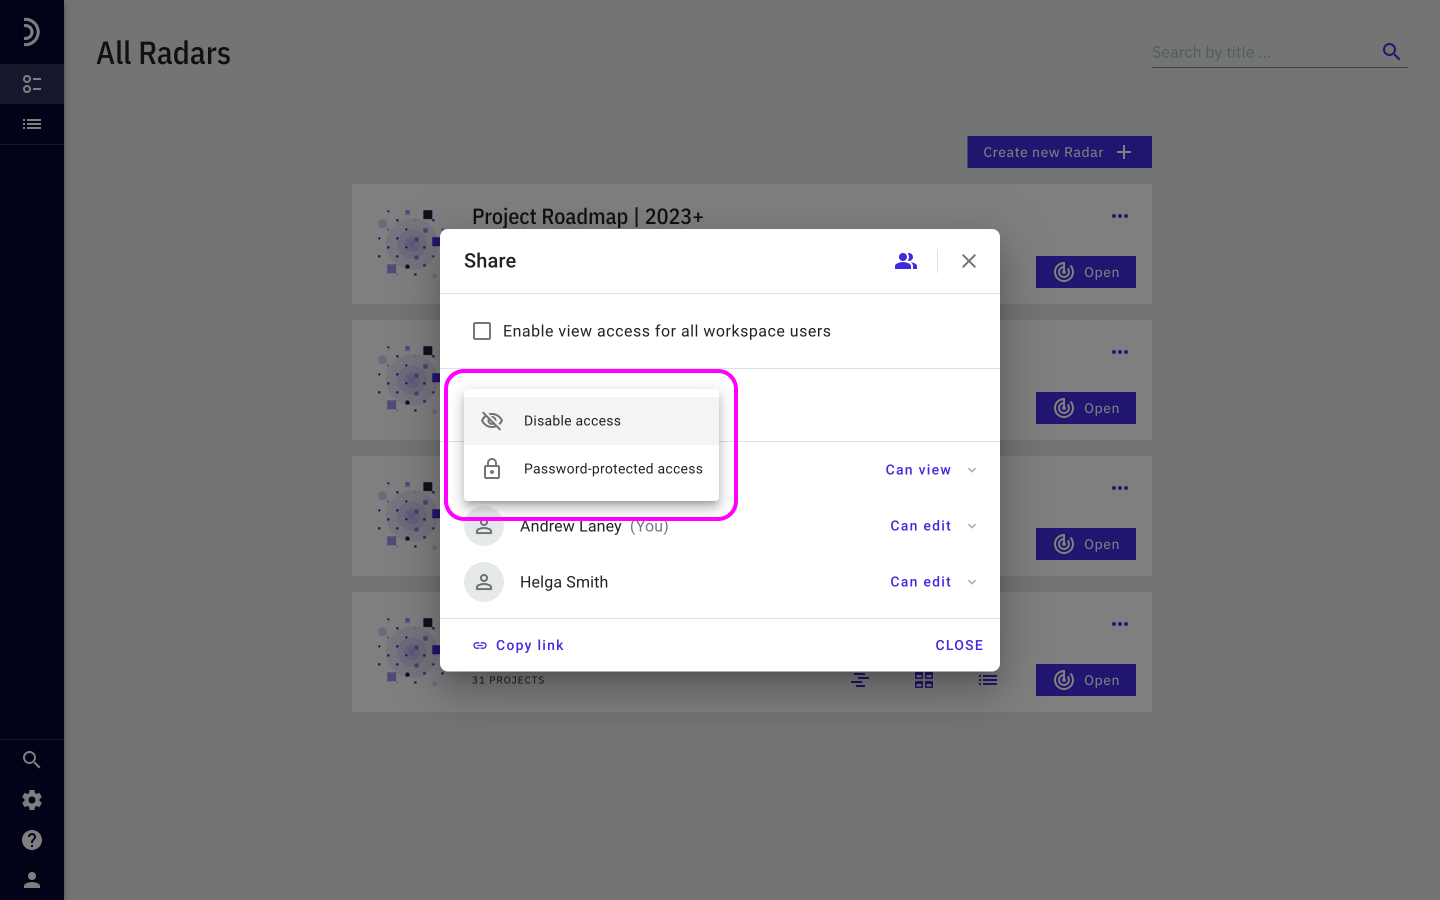
5. Optional: If you have selected Password-protected access, enter the password twice and click Save.

6. Click Copy link.
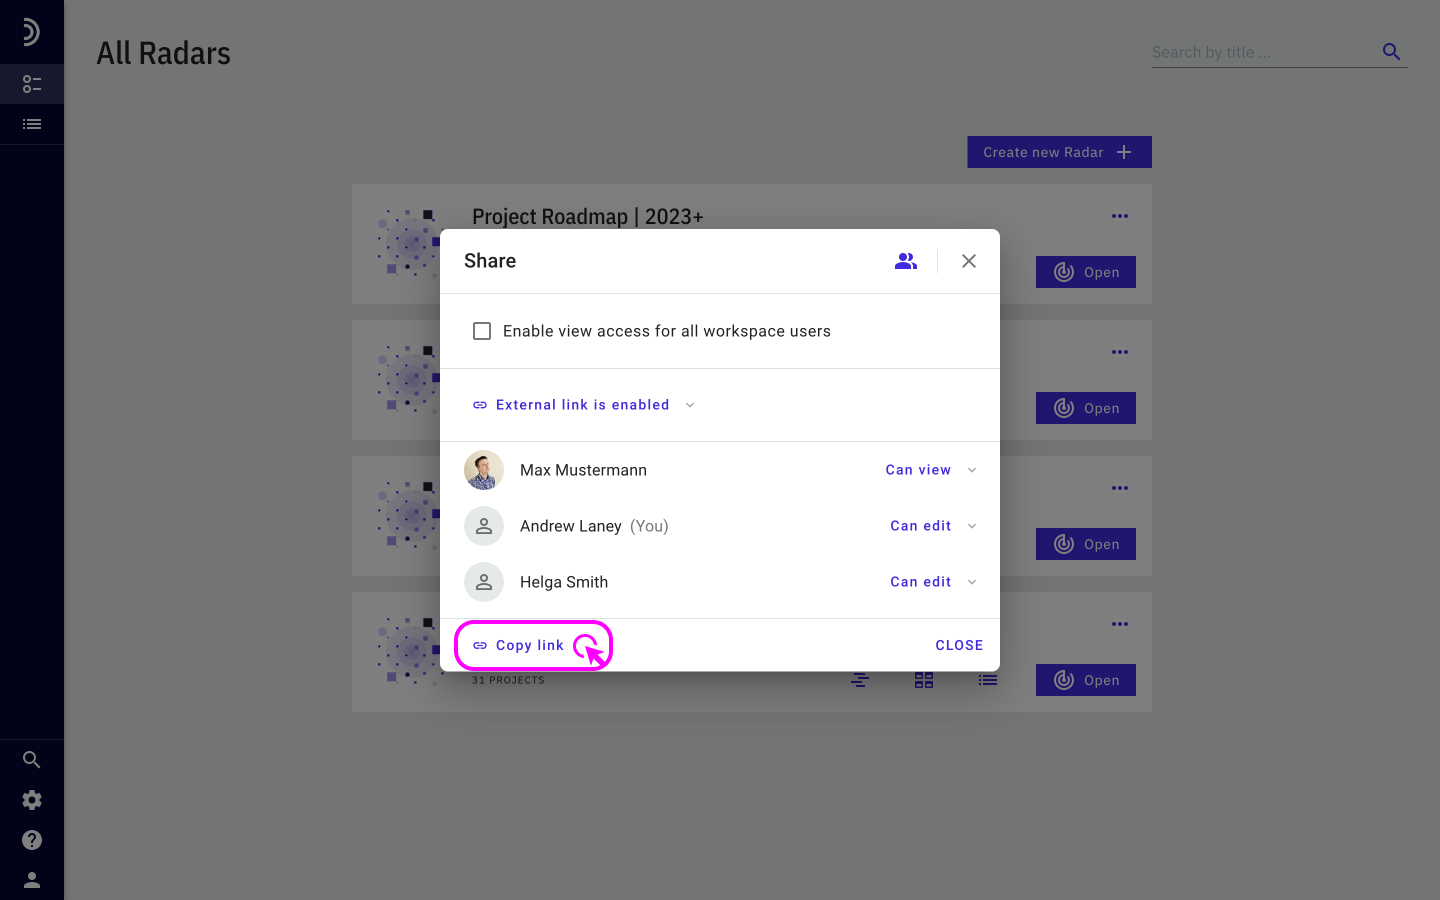
7. When you see a confirmation that the link has been copied to the clipboard, Close the dialog and paste the link to any of your preferred communication channels.

Note

Anyone with a link can access a view, even those you haven’t personally given permission to do so. It is recommended to protect views with a password to prevent unauthorized access.

Disable link access

If you no longer want anyone to have access to a shared view, you can revoke it by disabling the link.

To revoke access to a shared view:

1. Go to Overview and locate the shared view.

2. Click the three dots and select Share. Alternatively, open the view and then click the share icon at the top of the screen.

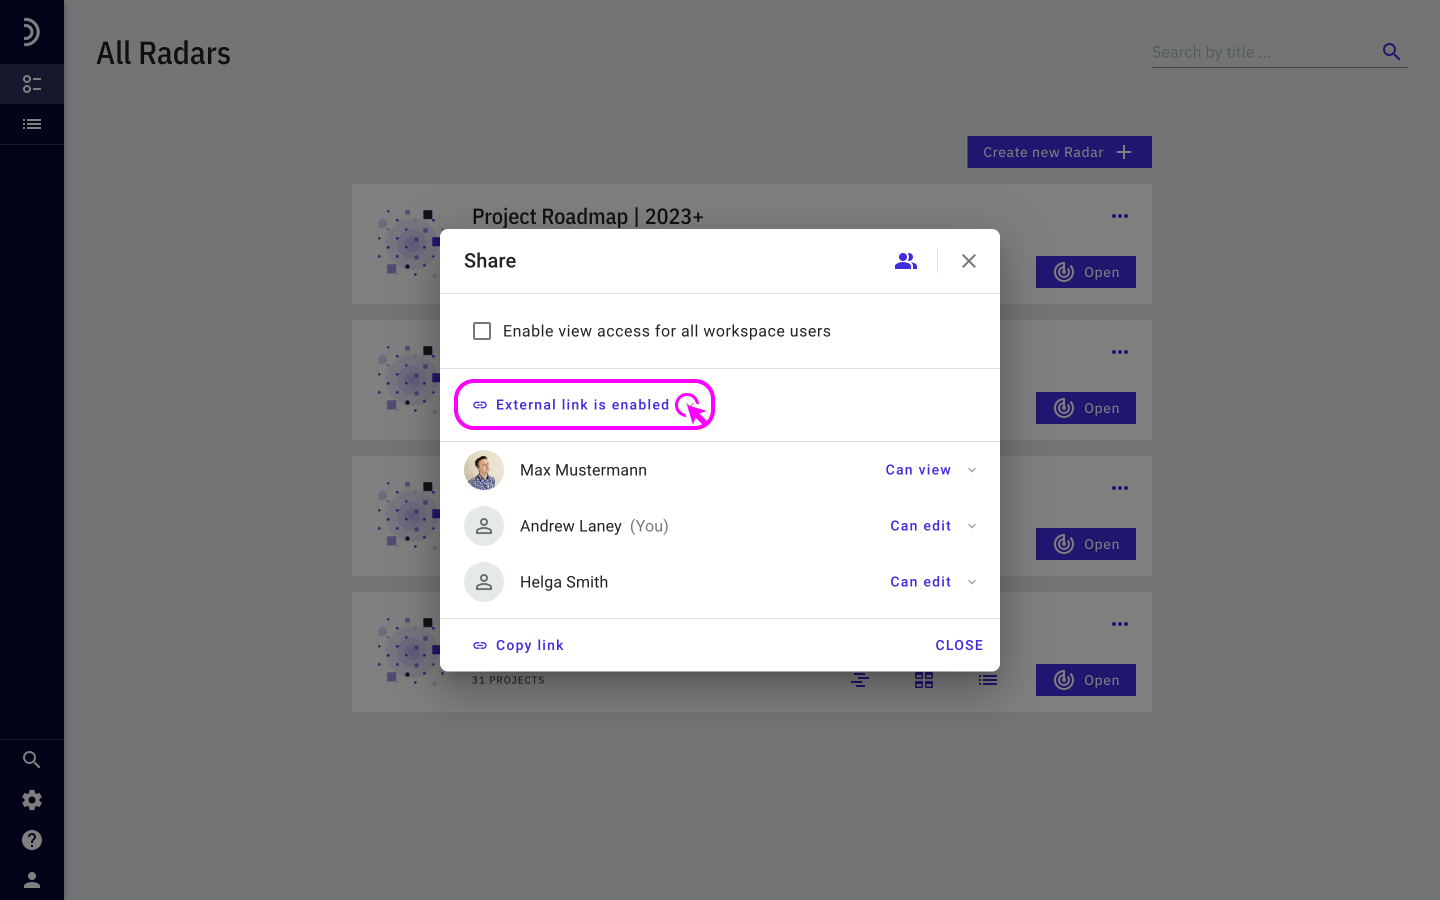
3. Depending on the currently allowed access, click External link is enabled.

4. Select Disable access.

5. Click Close.

Once you disable access, a link leading to the view will stop working immediately and permanently. Anyone who tries to access a disabled link will get an error message.

If you decide to provide access via a link again, you will have to share a new link with your target audience. Every link is unique and the same one can never be created again.

How to create a viewHow to copy a view?
Projects Radar logo
  • Follow
  • Follow
  • Follow
  • Follow
  • Follow

PRODUCT

Status Reporting

KPI Radar

Strategic Foresight

Pricing

COMPANY

About us

Career

Contact us

RESOURCES

Blog

Product release

White paper

Help center

©2025. All Rights Reserved GET Information Technology GmbH | Rudolf-Diesel-Strasse 14, 41516 Grevenbroich, Germany

Terms of service      Privacy policy       Legal notice