Prerequisite: Ensure that the voting function is enabled in your workspace. (See “How to Enable Voting?“)
To display voting results in a view, follow these steps:
1. Select a View:
Choose the view where you want to display the voting results.
2. Enter Edit Mode:
Click on the “Edit” menu item.

3. Open Additional Settings:
Navigate to the “Additional Settings” section.

4. Enable Voting Results:
Toggle the “Voting results” switch to the “on” position.

Once the voting results are enabled, a new button will appear on the right side of the view.

Viewing Voting Results
Access the Voting Results Panel:
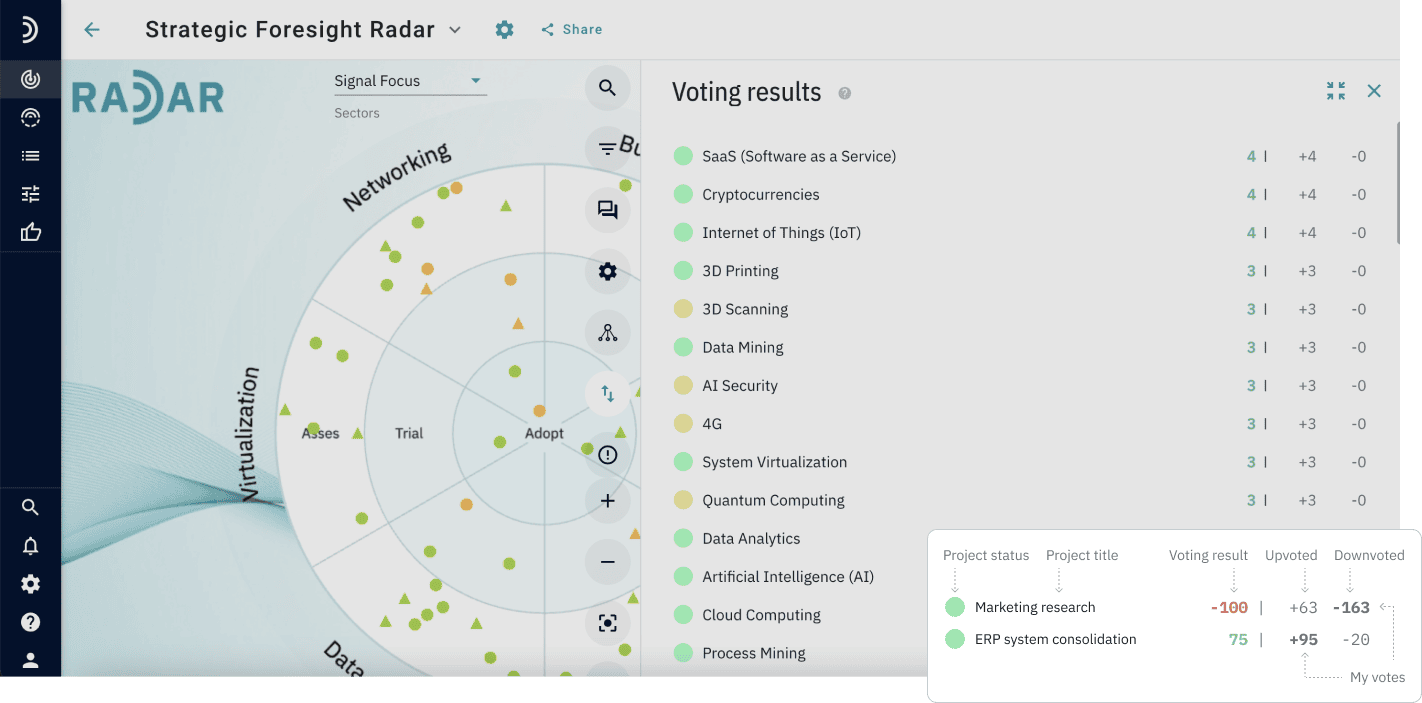
Click the button to open the “Voting Results” panel, which displays a ranking of signals based on votes.
Signal Ranking:
Signals are ranked with the ones showing the largest difference between “for” and “against” votes appearing at the top.

Color-Coded Differences:
The difference in votes is color-coded: green for positive and red for negative. Next to the difference, the total number of “for” and “against” votes is displayed. The votes of the current user are shown in bold.
This setup allows for a clear and immediate understanding of how different signals are perceived by the community.